Saturday, September 18, 2010

ABC Australia XBMC Video Plugin

**NOTE: this will no longer work in the latest releases of XBMC Dharma and is left here in case anyone is still running older versions

This simple XBMC plugin allows you to watch ABC Australia shows in XBMC.


The plugin can be downloaded here:

To install the plugin in XBMC simply unzip file above and then copy the folder into the appropriate XBMC plugin folder. For installation instructions for your particular platform(Linux, Windows, OSX, Live) see this post in the XBMC wiki.

If you are using XBMC live you can just FTP in to copy the files across.

NOTE: Most shows will work from outside Australia but some streams are geo-locked(meaning they can't be watched outside of Australia)

Setting a static IP in XBMC Live

For those of you who are not familiar with XBMC I highly recommend checking it out. It started out as a mod for the original XBox and has since developed into a really nice, cross-platform(Linux, OSX, Windows) HTPC interface. XBMC has since spawned several successful variants such as Boxee and Plex.
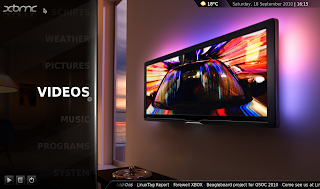


Also on offer is XBMC Live which is a stripped down version of Ubuntu designed to just run XBMC and give your HTPC a nice set top box kind of feel, without having to deal with the underlying operating system. You can boot XBMC Live from CD, USB or do a HDD install for a permanent installation.


Up till now i have been running Ubuntu 10.04 UNR with XBMC installed but I figured I'd try out XBMC live because I liked the neatness of having an entire OS devoted to the single task I want to use the computer for. Also just for the hell of it, i love XBMC and trying out new operating systems.

There's a great guide to setting up your own XBMC box over at LifeHacker:

My conclusion: Pretty Damn Good!
I've only been using the new setup for a week so I'm going to hold back my verdict of "Totally Awesome" until I have done some more testing but so far - perfect!

If you're after a weekend project you'll be disappointed because the entire install took 20 minutes and everything worked flawlessly( at least on my acer Revo R1600). That includes all codecs and my cheap generic MCE remote with all the buttons working and mapped as they should be.

However one of the first things I wanted to do was set up a static IP for the box. In the current release you cannot do this via the XBMC interface(I believe this feature will be added soon) so it's time to get our hands dirty editing some files.

Step 1. Open a terminal
to do this click on the power icon in the bottom left hand corner of the XBMC interface then select "Close XBMC".

Step 2. Login and start X
you will be prompted for your username and password, you need to enter them to continue. After entering your login information succesfully run the command "startx". This will log you into a basic GUI running on Fluxbox.

Step 3. Edit your interfaces file
Right click anywhere on the Fluxbox desktop to bring up the main menu the select:
Applications->Terminal Emulators->XTerm

sudo xedit /etc/network/interfaces

the file will look something like this:

auto eth0
iface eth0 inet dhcp

you need to change it to look like this:

auto eth0
iface eth0 inet static
address 192.168.0.4
gateway 192.168.0.1
netmask 255.255.255.0
network 192.168.0.0
broadcast 192.168.0.255

Obviously substituting the example values with the values for you own network.

These settings relate to your network, if you're not sure what these are use the values listed below:

netmask 255.255.255.0
network 192.168.[whatever ip range you are using].0
broadcast 192.168.[whatever ip range you are using].255

After editing you can save and close the file, the static ip address is now set but there is one more step to go, you now need to set your DNS server so you can access sites etc by url.

Step 4. Set your DNS
run this command at the terminal:
sudo xedit /etc/resolv.conf

set the DNS server like so:

nameserver 8.8.8.8

Now save and close the file.

NOTE: I have used the google DNS address (8.8.8.8) you can put your own value here or just use 8.8.8.8.

Now restart your machine and you should be good to go.

Saturday, September 4, 2010

Insteon SmartLinc Review

One line Summary: Not Very Good

I've wanted to get into home automation for a while so I thought I would splash out on an Insteon Smartlinc Plugin Starter Kit, i figured it would be a good weekend project and for $200 i thought - why not? I was pretty disappointed to find out the device is poorly made and does not work as advertised.

First off despite being controlled via a web interface it cannot be accessed by any device running linux. Well actually it can be accessed but because of the bug the load times are intolerable, just to navigate to the button to turn off a light will involve about 2 minutes of loading. "How can that be?" you ask. Amazingly the device does not implement networking protocols correctly and was clearly under tested. Due to this bug it will not communicate properly over a network with any linux device. "Who cares? linux has a pretty small user base" I hear you thinking. Well, ever heard of a little operating system called Android? That's right this device WILL NOT WORK WITH ANDROID. Despite the description on SmartHome's website saying "direct communication via the Internet or Wi-Fi from an iPhone, iPod touch or any other Web-enabled PC, Phone or PDA". After talking to Insteon and SmartHome they are aware of the bug but have no plans to fix it(or update their product description). So if you are running android or linux do not buy this device.

You can check out a detailed assessment of the bug here.

The second huge problem with this device is that despite being a web device you can only(reliably) access it from one browser on one device at a time. Due to the incredibly shoddy design the mechanism for determining a devices's status(On or Off) will only work for one client at a time. That means for instance if you left your browser logged in at home and then go out or to another computer you have no way of know if you devices are on or off. Again Insteon and SmartHome are aware of this and have no plans to fix it(or mention it in the product description apparently, so it's a nice surprise for you after you spend the $200).

There are a bunch more bugs as well(ie. dimming does not work etc.) they have been outlined here.

So in conclusion: the device is poorly designed, tested and coded. It may work for your circumstances and setup but it certainly didn't for me and many others. I could not recommend anyone buying this device. If Insteon was actually going to fix the bugs with a firmware update I might change this opinion as the hardware seems like ok quality but as it stands the device is essentially useless for my needs - despite clearly stating it should work in the product description.

Monday, August 30, 2010

Detect when a user stops typing with jQuery

When writing forms I frequently find I need to do some of my validation server side(for example checking if a username is already taken) but want to have a responsive real-time field validation displayed to the user. Obviously this effect can be achieved using AJAX but if you want to validate while the user is typing sending an AJAX request on every keypress is a very inefficient way of doing things. It seems to me that a "onInputFinished" event is needed so that you can detect and take action when a user stops typing in an input field.

I had a bit of a google around and couldn't find an elegant solution for it so I decided to roll my own using jQuery. This simple jQuery script allow you to add the "onfinishinput" attribute to HTML input fields in the same way you would use normal onclick and onkeyup events.

you can check out a working example here:


Using the Script:
After including the script on your page you can use the new event like this:

<input type="text" onfinishinput="alert('You typed ' + input_field.val())" />

NOTE: instead of using "this" when referring to the element use "input_field" like the example above.

Installing the Script:
The script can be downloaded from here:

The script requires jQuery to function, the latest jQuery can be downloaded from here:

Just include the scripts on your page and you are ready to go.

Monday, June 14, 2010

Playing AVI MP3 DIVX and MP4 in Meego

I recently installed Meego V1.0 on my Asus eee 1000HA and I must say I am very pleased with it. One of the most obvious omissions from this release is the ability to play divx, avi, mp3 and mp4 files. I did some googling and managed to figure out how to do it but the process is rather long and involved so I decided to combine it all into a script so you can install or your codecs with one line at the terminal.

ASUS Eee PC 1000HA 10-Inch Netbook (1.6 GHz Intel ATOM N270 Processor, 1 GB RAM, 160 GB Hard Drive, 10 GB E-Storage, XP Home, 6 Cell Battery)
One of the few bits of hardware fully supported by Meego.

Since the release of Meego 1.1 there have been some changes so there are now 2 different scripts.


*Note: because of all the compiling the script does it can take over an hour to run so I strongly advise connecting to AC power before running it.


For Meego 1.0
Download the script from here:
http://dl.dropbox.com/u/6217043/divx1-0

Now open a terminal and type:

chmod a+x ./divx1-0
sudo ./divx1-0


For Meego 1.1
Download the script from here:
Now open a terminal and type:

chmod a+x ./divx1-1
sudo ./divx1-1

*Note: you must first cd to the directory where you downloaded the file. ie. if it is in "Downloads" type "cd Downloads" first.


Now reboot(it wouldn't work for me until after a reboot)

This script is based on information found at:

Thanks to Eduardo Gonçalves for the advice on the 1.1 script.

Now you can enjoy your MP3's and AVI's on Meego.

You can also check out the thread about this on the Meego forums at:

Thursday, May 13, 2010

XBMC Web Remote Control for Android and iPhone

NOTE:  I have created a new version of the remote that has many more features and is compatible with the latest version of XBMC.  Go here for details.


**NOTE: this will no longer work in the latest releases of XBMC Dharma and is left here in case anyone is still running older versions.

For those of you who don't know XBMC it is Home Theatre PC software. What's that you ask? Basically it is software you can run on you computer when it is connected to your television to give you a nice TV and remote control friendly interface for watching movies and listening to music etc. One of the best things about XBMC is that it runs on Linux, Windows and OSX so you can bask in its awesomeness no matter what OS you run.

Unfortunately the current XBMC web interface doesn't really work too well on small touchscreens like those on Android and iPhone so I decided to go ahead and write my own.

This is the Beta version of what I am calling XMBC Web Remote(XBMC-WR). It uses XBMC's built in webserver so installing it is as easy as copying it to XBMC's web folder. The XBMC Web Remote allows you to easily browse, play and queue up music and video from your phone or other touchscreen device.

Some of the key features:
-Ability to browse your Music, Video and Picture libraries
-Queue up videos and music
-View video and music playlists
-Play, pause, volume, etc.
-Menu navigation buttons


The Main Menu screen:


Selecting a video:


Playback Controls:


Installation on Ubuntu:

Step 1 - Enable XBMC web interface
Open XBMC and from the main menu select "System" then "Network".
In the Network Settings menu select "Enable control of XBMC via HTTP".

Step 2 - Install XBMC Remote
Open a terminal and then run the following commands..

wget http://dl.dropbox.com/u/6217043/remote.zip

sudo unzip -d/usr/share/xbmc/web remote.zip


Installation on Windows

Step 1 - Enable XBMC web interface
Open XBMC and from the main menu select "System" then "Network".
In the Network Settings menu select "Enable control of XBMC via HTTP".

Step 2 - Install XBMC Remote
Download and run the installer


Installation on OSX

Step 1 - Enable XBMC web interface
Open XBMC and from the main menu select "System" then "Network".
In the Network Settings menu select "Enable control of XBMC via HTTP".

Step 2 - Install XBMC Remote
I'm not sure where the XBMC install folder is in OSX, I don't have a Mac to test it on. You should be able to download the zip file here and extract it to the "web" folder in you XBMC installation directory. If someone could test this out and let me know I'd appreciate it.


To test that the install is working start XBMC if it is not already running. Next open a browser (preferably Chrome as animations etc will only work in webkit based browsers) and go to the address

http://127.0.0.1:8080/remote

*Note: this assumes you are using the default port 8080

To use the remote from your Android device or iPhone just open a browser and go to:

http://<the ip of your XBMC box>:8080/remote


Any feedback, comments and feature requests are welcome. It is still in Beta so if there is something you would like added let me know and I'll do my best to get it in the final version.

You can check out the XBMC forums thread about the web remote at:


Wednesday, May 12, 2010

Blumpit Firefox Plugin for Touchscreens Review and Walkthrough


I recently tried out a rather nifty Firefox plugin called Blumpit which is designed specifically for touchscreen devices. Blumpit is currently in alpha so it is still a work in progress but the alpha release is relatively stable and functional. My inital thoughts on Blumpit: Almost Awesome! When I say awesome I mean not just the product, but the idea. The use of a Firefox plugin to achieve the end result(ease of browsing on a touch screen) is a very novel idea and also means cross-platform compatibility. When I say almost I mean the product is still in the alpha stage and is not yet considered finished so there are plenty of rough edges. If the Blumpit team can polish it up before the final release then they will have a very slick applic ation which offers a universal touchscreen browsing experience regardless of the OS platform(as long as it runs Firefox).

I think the best feature of Blumpit is the the on screen keyboard. It works well and appears automatically when you click a text input on a web page and slides back into the bottom of the screen when not needed. Another nice feature is the "Web Applications" screen which functions kind of like a desktop, with big glassy icons for all your favourite web apps.

I guess the niche I could see Blumpit filling is for use on convertible netbooks/laptops which combine both a keyboard and a swivel around touchscreen for use in tablet mode. If you are using a touchscreen only device you are probably better off using a touchscreen oriented operating system like Android. I'm using it with the Asus eee T91 and Blumpit provides a quick and easy way for me to switch from a full desktop operating system to a touch based interface without the need to reboot.

One feature that is quite obviously missing from the alpha version is touch screen scrolling, however this can be easily overcome by installing Grab and Drag plugin for Firefox. Another feature that is missing is multi-tabbed browsing which I sincerely hope will be coming in the 1.0 release. Autocomplete on the search box is also missing but will hopefully be in the next release too.